
The Unistellar eVscope
- Stephen Strum

- Jun 17, 2021
- 20 min read
Updated: Jan 24, 2022
In this post, we are going to take a look at the Unistellar eVscope. A 450mm focal length, 114mm aperture digital telescope that is fun to use and can show you the wonders of the universe easier than just about any other telescope.

The eVscope started out as a project on Kickstarter and Indigogo a few years ago but is now available directly on the Unistellar website as well as from other astronomy gear retailers. The telescope replaces the secondary mirror with a Sony IMX224 camera chip, the same as what is in the ASI 224MC camera. This version also includes a digital eyepiece with an OLED screen, but you can simply view your images on your phone or tablet as well which you will need to control the telescope. Unistellar also offers a version without the digital eyepiece called the eQuinox. While the eVscope has a 450 mm focal length, the field of view of the images is only about 0.5 degrees. However, if Unistellar had used a larger image sensor, then the images would have had significant coma and field curvature beyond about half a degree anyway. That would have required a field flattener being added to the optical system, increasing cost and complexity. Since Unistellar plans to add some additional telescopes to their line in the future, I would guess one of them will probably offer a larger field of view.

The telescope contains an internal computer, basically a Raspberry Pi, that controls the go-to, tracking, and does the live image stacking. Since the eVscope is an alt-az mounted scope and doesn't physically correct for field rotation, individual exposures are limited to only 4 seconds to prevent star trails, with those 4-second exposures then stacked to produce a more detailed image over time. The computer software will correct for field rotation, allowing you to integrate hours of data on a single object if you wish. In general, it seems an 8 minute integration time gives you the best "bang for your buck", with steady image improvement up until that point, and then much slower improvement to the images beyond that time for most objects. However, you will still achieve a better final image if do 10, 20, 30-minute integrations or longer, but the incremental improvement is less. As I mentioned earlier, you operate the telescope with your phone or tablet, on which you can save the images. However, data is also saved on the telescope itself and can be uploaded to Unistellar for citizen science projects. As of this time, you do not have access to the raw data acquired by the telescope, however, you can ask Unistellar to send you the raw files after you first upload them to Unistellar from the telescope. Hopefully, Unistellar will eventually make the raw data accessible directly from the telescope, perhaps through a computer application given the much larger file sizes.
The eVscope has an internal battery that is stated to last up to 10 hours, but in practical use, you can probably expect 5-8 hours of run time (maybe a little longer in warmer weather). The more often you slew the telescope back and forth across the sky, the shorter the run time will be. Sticking to targets in the same region of the sky will give you a longer run time. You can plug the scope into an external battery for longer run times, or run it off AC power. Usually, I am able to use the eVscope for several observing sessions before I need to recharge.

The eVscope is a tremendously portable telescope, weighing only 19.8 pounds (9 kg) fully assembled (14.4 lbs for the scope and mount, and 4.4 lbs for the tripod) and completely packing down into a backpack that is roughly 28" high, 9" deep, and 12" wide (71cm x 23cm x 30cm) The tripod does hang on the exterior of the backpack, however, adding another 4" or so to the 12" width of the backpack. The backpack makes for a great storage and transportation case, but you can also find Pelican cases and the like that will fit the shipping foam, allowing you to make your own storage and transportation case.
How does the eVscope ship?
I picked up the version that ships with a backpack case, and so the telescope ships double-boxed with the telescope inside the backpack. The tripod and accessory box ship in foam next to the backpack, though both fit in or on the backpack case. If you don't get the backpack, the scope will just ship in a fitted foam package much like any other telescope. Regardless of what version you buy, the scope ships well padded.

How do you set up the eVscope?
Setting up the eVscope is fast and easy. First, you need to set up the tripod, leveling it with the included bubble level. A level tripod will generally allow the telescope to have faster go-to's and allow it to track more accurately.


Once the tripod is set up, simply place the telescope and mount on the tripod, lock it in place with the two thumbscrews, and push the power button.
Once the scope is powered on, connect to the telescope wifi with your phone or tablet and open the Unistellar application. It is usually a good idea to go ahead and take a dark frame each time you use the scope, but you don't have to do that. Taking a dark frame will help to remove the image sensor noise from your images, giving you a better-looking image.

Next, make sure your telescope is roughly in focus, have your telescope initiate field detection and then have it point to a brighter star. It is helpful to pick one 20 or more degrees away from the zenith in order to more easily reach the collimation screws and focus knob if you need to make adjustments. In this example, I picked Altair. You can just manually slew the scope to a bright star, pick one from a list in the application, or search for one in the application as I did.

Once you have a star in the middle of the telescope field of view, defocus the star to check collimation, and adjust collimation if needed. This won't need to be done every session but is good to check after traveling with the telescope since the mirror can shift a bit if the scope was bounced around in transit. You can adjust the collimation using two adjustment screws on the back of the telescope and you want to get the shadow of the secondary spider perfectly centered on the star image. You can see my collimation was a little off on this day, and so a couple of quick tweaks were needed to get the scope collimated, which in turn help the scope to produce nice round stars in the images.

The mirror support and collimation are rather unique on the eVscope with a four-point system used instead of the usual three-point support system. Two support points use springs, with the other two using a push-pull system with springs pushing the mirror and screws pulling it. This system makes collimation much easier for those new to collimation, since it can be hard to figure out what screws to adjust when there are only three. However, in theory, having four points of suspension can be less stable. But, since the mirror is small and weighs little, this probably isn't an issue in practice, and an easier to figure out collimation system probably makes more sense to implement.
Here is a closer look at the internal mirror cell support, collimation, and focus system.

To collimate your eVscope, look at how the secondary shadow is offset from the center. If the secondary cross is shifted below the center, use the controller to shift the star towards the bottom of the screen, then adjust the collimation screw to bring it back to the center. If the secondary cross is too high, shift the star to the top of the screen, and then adjust the screw to bring it back to the middle of the screen. My secondary shadow was also shifted to the right, so I moved it to the right side of the screen and then adjusted the collimation screw to shift it back to the center. While not perfect, the collimation is now better as you can see below.

Finally, before you begin using your scope, you need to adjust the focus. The included Bhatinov mask will allow you to achieve perfect focus. Add the mask to your optical tube, and adjust the brightness of the star until it is dim, but still easily viewable. You can see the included Bhatinov mask below.

If the spikes the Bhatinov mask creates are too bright, your star will look to be in focus even when it is not. The thinner the spikes are, the easier it will be to achieve perfect focus. Adjust the focus until all the spikes are evenly spaced and you have a small round dot in the middle of the spike pattern.

Then, you can remove the Bhatinov mask and select a target to observe. You can either pick one from the database or enter your own coordinates. Select enhanced vision once the telescope has slewed to your target, and watch as the image of the object slowly improves with time. You can then save your images by clicking a button on the screen, and in the settings, you can either select to save the image with a round data overlay around the object or to save the full rectangular image with no data (which allows you to see a larger view).

What do the views and images out of the eVscope look like?
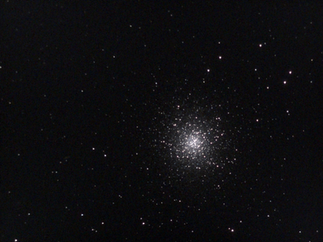
Here are some sample images I have taken with the telescope, all from Bortle 6 and 8 skies (that is, suburban skies with significant light pollution). Images would look even better from a darker sky site. You can see both the images straight out of the telescope with auto settings as well as those with some quick editing done in Lightroom. You can achieve some of the improvements done in Lightroom by choosing and adjusting the manual settings in the eVscope application, as the "auto" settings won't always give you the best image result. If you have the version of the eVscope with an electronic eyepiece, you may find the views through there look even better than on your phone or tablet. Since you are looking at a similar resolution view through the eyepiece, but one compressed down to a smaller physical screen, stars look more pin-point, and the view overall looks more natural. However, I find that I simply look at my phone screen most of the time, and often, when it is cold or hot outside, I'll leave the telescope outside, and control everything from my phone inside the house.

M8, M57, and M27 Original Images with Auto Settings
Plus Versions with Enhancements Made in Lightroom
Keep in mind most of these objects will look better with longer exposures, if taken from a darker observing site, or if multiple images are stacked afterward.


Additional Image Examples (Little Gem, M16, M81, M13, M5, and Horsehead)


Be sure to check out the eVscope Facebook group for better examples of the image quality that is possible with the eVscope. The ones here pale in comparison to those people have posted that were made from longer exposures.
So, what can you do to improve your images?
The number one thing to do is make sure you take dark frames each session since sensor noise will vary with temperature, and the dark frames help to greatly reduce image sensor noise on your images.
You will find that you can frequently improve your images significantly by doing some basic edits in Lightroom or another photo-editing application. Often there is far more data in your image than what first appears. By varying the black point, exposure, and light curves you can often dramatically improve your images by bringing out detail that was hard to see in the initial image.
As mentioned earlier, you can also achieve some of the same gains you get by editing your images in software by manually adjusting the image capture settings in the eVscope as well. You can also take a few images of the same object with different settings and then combine them later in software. For example, the auto settings will overexpose the cores of objects like M42, and so you can manually adjust the settings to image the core correctly, and then do another image to bring out more detail in the wings of M42, and then combine them together in image editing software.
In general, manually stacking multiple stacks of images in Deep Sky Stacker or other software can further reduce image noise. You can do this with images taken over multiple sessions, so keep track of your images, and over months and years, you can keep adding data to images you have taken in the past to further improve them.
The eVscope software doesn't currently allow you to use a flat (just a dark frame), but you could, in theory, take a flat to use if combining multiple images in software such as Deep Sky Stacker. I haven't tried that, and so I don't know how much of a benefit that would provide.
Creating a larger panorama of an object is also worth trying. Start with taking five images of an object, one with the object in the center, then four more with the object of interest placed in the lower left, lower right, upper left, and upper right portions of the screen. Use PhotoStitcher or a similar application to stitch five images into one with a larger field of view. Try to have each image overlap at least two other images by about one-third or more, particularly if there are fewer stars in the field. You can see below the five images of M13 I took and combined into one larger image. You could then try to do a larger panorama with nine or more individual frames combined together. For best results, keep the image integration time about the same in each of the images you plan to stitch together.
Five M13 Images Used in Panorama


Final M13 Image Created by Combining Five Images Above Using PhotoStitcher for Mac

However, your panorama attempts can fail with larger galaxies if the portions of the galaxy that overlap in the images vary in brightness, at least if attempting to have the software automatically stitch the images together. I wasn't able to successfully create a panorama showing all of M81 and M82 together in one image, for example.
A narrow band filter can also help improve your images significantly if you live in a region with extensive light pollution. While it is a bit tedious to install a filter the first few times you try it, and you need to buy a special adapter, using a narrow band light pollution filter can significantly improve image contrast by keeping the sky background darker which helps make nebulae much more visible in the image. Filters that seem to work well are NBP filters, the Optolong L-extreme filter (narrow Ha and OIII bands), and similar filters. Most nebulae emit a lot of light in those two bands, and by eliminating all other light you will significantly reduce light pollution and increase contrast in your images.

To install a filter, make sure the telescope tube is pointed horizontally, or slightly below horizontal. Add the filter to the adapter (there is an Amazon link to one that works well above), and reach into the front of the telescope to thread the adapter with filter onto the front of the camera sensor tube. It is critical that your telescope be pointed horizontally as you are almost certain to drop the adapter the first time you try to do this, and if the telescope isn't horizontal, that will result in the adapter falling onto your mirror, causing damage. Once the filter and adapter are installed, you can use your scope as usual, though you will need to refocus. The filter will dim star images, and so the telescope's field detection and tracking can fail when using the filter if the stars in the region you are imaging are not bright or numerous enough.

What kind of upgrades can you do to the eVscope?
While the eVscope isn't really upgradeable, you can still make some modifications. Adding a finder can be a nice addition as it allows you to look at objects in the sky you might not know the name of and can help you learn the night sky. The stick-on Telrad finders are a great, no regrets option since they are easy to install and you won't need to drill any holes.

You can replace the mirror (in theory) if you damage it. Adding a dew shield with dark flocking, or flocking the inside of the telescope tube (which is easy to access) can help improve image contrast in areas with stray light. As you can see, the inside of the telescope tube reflects quite a bit of light, and cutting down on light reflection will help out with image contrast.

The easiest way to cut down on stray reflected light inside the telescope is to add a dew shield to the front of the telescope which will block stray light from entering the telescope tube. A cheap option that works well is this Farpoint dew shield designed for a Celestron C5: https://bit.ly/3gCm7LG (or click the image below to go to the Farpoint page for this dew shield).
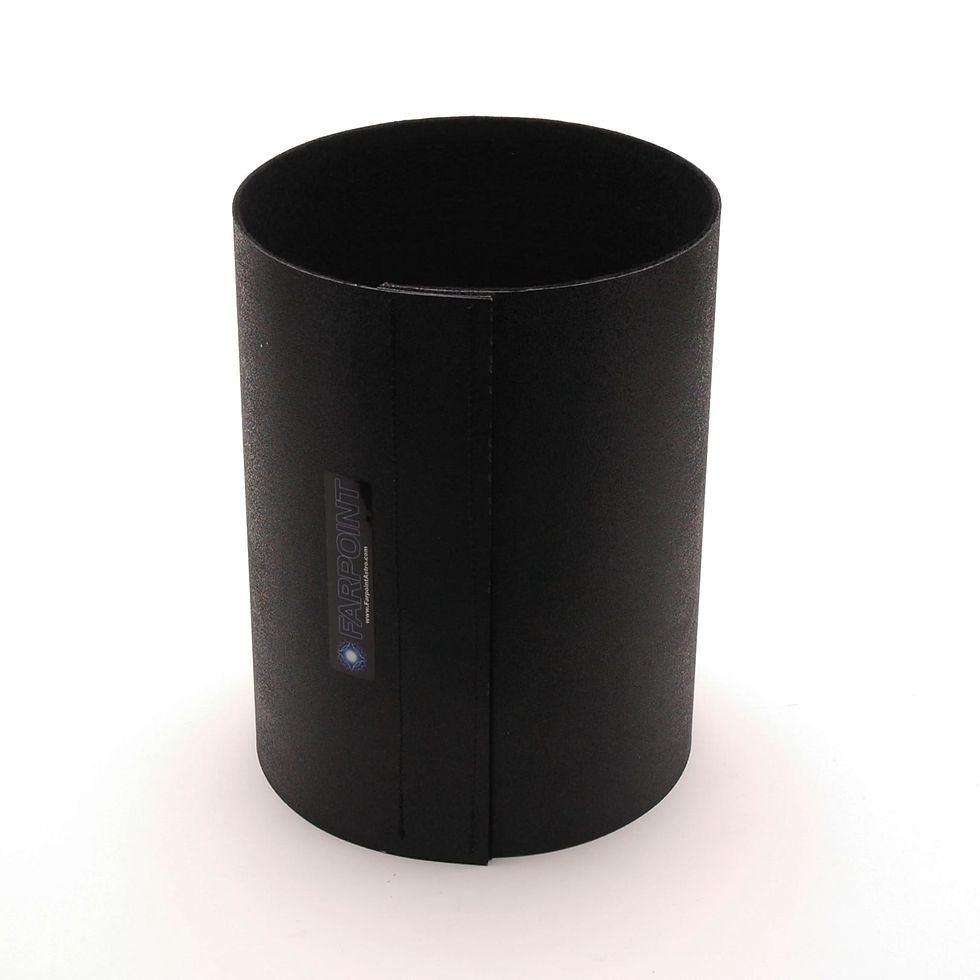
That dew shield simply wraps around the front of the telescope and is secured with velcro. You can simply slide the dew shield down the optical tube when the scope is not in use or if you need to access the lens cover or focusing mask, and then slide it up when you need it. Finally, the internal SD card can be replaced if it goes bad, although you have to remove the mount cover to access it.
Should You Buy the Backpack?
The eVscope backpack is another significant added cost, but if you plan to travel at all with the telescope, or just want a secure way to store the scope and take it outside (particularly if any staircases are involved), I highly recommend the backpack. It securely stores your telescope, tripod, accessories, and has room left over for star charts, a finder scope, an external battery, or other items. Carrying the telescope to your observing site is a breeze with everything on your back since it leaves your hands free for opening doors, holding handrails, or carrying a chair and a drink. However, if you primarily observe from home, you can leave the eVscope assembled and easily carry it outside since it is so lightweight. Alternatively, you can buy a pelican case or similar container that fits the packing foam, and use that for a storage container. The Pelican 1650 case will fit the telescope packing foam and can be used as a storage and transport container.
The Pelican 1615 case, which comes with pluck foam, also fits the telescope and tripod well. But, instead of using the shipping foam, you pluck out the foam inside the case to fit the telescope, tripod, and your accessories. It is, however, a little smaller and lighter than the 1650 case.
You can see below how the telescope is secured inside the backpack.

Without the telescope, you can see accessory pockets on the inside for the lens cover and eyepiece cap, as well as the removable storage case for your tools, power cord, and other accessories.

The tripod conveniently attaches to the side of the backpack, much like backpacks designed for photographers. Note that you have to make sure the two thumbscrews used to tighten the telescope mount to the tripod are facing away from the backpack or the tripod won't fit properly.

So, what are the Pros and Cons of this scope?
The eVscope's biggest selling points are the incredible portability, crazy fast setup, and perfect go-to and tracking. You can get really nice views of objects in very little time, and see many objects in a single observing session. The software has improved leaps and bounds over where it was just six months ago and numerous further improvements are in the works. The software is easy to use and you can also have multiple people connect to the scope at the same time. That can make the eVscope great for outreach since people can save images to their own device directly from the telescope.

However, there are certainly some cons to the scope, particularly the high cost. You can, without question, build a telescope setup that will produce equal or even better images for somewhat less money, though it won't be nearly as clean a setup nor as fast and easy to set up. You have a fixed focal length with the eVscope, and so any zooming in/out is all digital in nature. You simply can't get good high-power planetary views with this telescope because of the short focal length, but you can still see some detail on Jupiter, and see the rings of Saturn. The eVscope can still provide pleasing views of the moon, however.
The self-contained nature of the eVscope makes for incredible ease of use, but that also limits upgradability. Again, you can add filters, but it is somewhat tricky to do so, and you can't add a Barlow or reducer lens. The ability to add a Barlow would greatly increase the performance on planets. The mirror is easy to replace, and the computer is a Raspberry Pi, so it could in theory be replaced if needed or upgraded eventually. The SD card can be replaced for more storage if needed (though you have to take apart a portion of the mount to access it). The app has improved tremendously but still has some limitations. There is no connection to SkySafari or other apps yet, and the application doesn't include any planetarium software. So, while you can select objects, and view a sky map of where the object is located along with other information, there is no easy way to select a portion of the sky and see what objects are available there. You can do this by editing what portion of the sky is visible at your location, but ideally, there would be a planetarium software plug-in to make it easier to plan your viewing sessions. I currently plan my sessions using Sky Safari first, or Stellarium, but having that integrated into the eVscope software itself would be nice.

Should YOU buy the eVscope?
Well, if the idea of having a simple and fun to use, highly portable telescope for viewing deep-sky objects appeals to you, then this is a great option. The eVscope can also be a gateway drug to more advanced astrophotography. You can actually do quite a bit with the telescope, and users have been producing some impressive images and doing interesting science with the telescope lately. Be sure to check out the eVscope Global Users group on Facebook to see what people are doing. For example, Richard Berry is doing Photometry with the eVscope:

David Hein has done some amazing composites of Eta Carinae, and he and others have also added solar filters and done some white-light solar imaging with the eVscope (post below from the eVscope Users Group on Facebook).

You can also take part in verifying exoplanets with the eVscope, and Unistellar has the following plot on their website showing data collected from a few eVscopes that helped to verify exoplanet HD 189733b.

Even though this telescope won't produce images quite as good as most high-end astrophotography setups, the image quality has improved markedly with recent software updates and likely will continue to improve as more functionality is added. Anyone who has never done astrophotography before, or has only dabbled in astrophotography will likely be impressed with the telescope's output. Also, if you want a great outreach scope, this is a superb option. The citizen science applications are also a nice selling point, especially the potential to do things like helping to confirm potential exoplanets. Buying an eVscope is a great way to help support the development of new technologies like this. Of course, you need to be able to afford the telescope to buy it, so that is a significant decision filter for most people. But, if you can afford the telescope, you will have a great time looking at all types of deep-sky objects you likely never would have looked at with a regular telescope because they would be too faint to see visually, or hard to locate.
Why should you NOT buy this scope?
Number one, if you are on a tight budget, this probably isn't the best way to start out. Also, if you are wanting to dive straight into big-time astrophotography, this isn't the most advanced setup you can buy. If your primary interest is in looking at planets, buy a Celestron Evolution 8 or 9.25", and get stunning planetary views and save $1,000 or more to boot. Or, pick up an 8" Dobsonian telescope for $500 or so, which can provide great views of brighter deep-sky objects and produce great planetary views, albeit with no go-to or tracking functionality. If you want "real" views through a telescope, not ones displayed on a screen, then pass on this scope. Also, if you like wide-field views of the night sky, this scope won't do that for you. Finally, if you don't like the idea of being tied to a phone to run your telescope, then this also isn't the telescope for you. In general, the eVscope is in some ways like the venerable 8" SCT telescope. It isn't going to be the best at most things, but it does a lot of things reasonably well, and the broad skill-set of the eVscope combined with the super portability and incredible ease of use make it the kind of telescope that will get used a lot if you own one. Unistellar has this plot of the eVscope's skills on one of their websites, and it summarizes things well.

My final thoughts on the eVscope after having used it for six months
Well, the bottom line is that this telescope is incredibly fun to use, and is my current most-used telescope. While it might not seem like a great value on paper, most people who buy the telescope seem to love using it, at least once any issues are resolved. The first eVscope I received had mirror issues, primarily severe focus shift, making good collimation challenging to achieve. When you defocused a star it would shift from the middle of the view all the way to the outer edge. I suspect the mirror had some type of mounting issue. In any event, Unistellar's customer support was great and they quickly replaced the telescope after some back and forth communication involving me sending some screen recordings of the issue I was having. The replacement telescope has had no issues at all and has been superb. There have been some known quality control issues with the eVscope, the most common being overly tight mirror clips, and I've heard of a few other random issues. Overall, their quality control seems to be improving with time, and they will quickly help you fix or replace your telescope if you have any issues.
This telescope can be a tremendous sidekick to your other telescopes. I sometimes take the eVscope out with a small refractor that can provide wide-field views, or with my 8" EdgeHD SCT that can do great high power views. Or, I'll be doing planetary imaging with the SCT and my computer, and deep-sky imaging with the eVscope and my iPhone. The eVscope has also been the primary telescope I've traveled with so far this year when traveling by car. The telescope bag technically exceeds the carry-on size for most airplanes in terms of its length, though I've seen where others have taken them on as carryons and have been ok doing so. I've recently come back from a trip to Florida, and on that trip, I took my Tele Vue 60 refractor which obviously has no trouble fitting in a standard carry-on bag. I was tempted to bring the eVscope but was concerned I would end up on a smaller regional jet for one of the flights which would require checking the telescope, or I would run into a situation where all the overhead bins were full.
So, here are my personal ratings for the eVscope. Everyone has a different set of values when it comes to technology and telescopes, so your opinion on these may vary.

Portability is fantastic, and the scope is extremely easy to use. The only issue is that you still have to collimate the scope periodically, like any telescope with a mirror, and precise focus is very important. While easy to do, collimation can still be intimidating for people new to telescopes.
The eVscope is very fun to use, especially as the software has improved, and further software updates will bring even more features. The main downside to the eVscope is the poor performance on planets, resulting from the short focal length. You can still view the planets of course, but you won't be able to see a lot of detail like you would in a bigger, longer focal length scope. The eVscope is designed for deep-sky objects, and it does well there. The 0.5-degree field of view does limit viewing of a handful of large objects like the Andromeda Galaxy, but you can create composites to produce a larger field of view image. Hopefully, Unistellar will implement an automated panoramic mode before long. Also, since the eVscope corrects for field rotation using software, long integration periods will further shrink the useable field of view.
The eVscope is fantastic for outreach, especially will multiple people being allowed to connect to the telescope and save images to their own device at the same time. The cost of the eVscope is certainly high, but if you can afford the scope you won't really think about that as you enjoy using the telescope. But, if the $3,000 is a stretch for you, consider buying something like a 6" or 8" Celestron Evolution scope, with a reducer lens, and an ASI camera. The ASI software has a live-stacking function, similar to the eVscope, that you can run on your computer. Or, you can buy the ASI AIR PRO unit which you connect to the camera and can run that software, allowing you to operate and do things with your phone or tablet, much like the eVscope. That can save some money, and allow for future upgradeability, but at the cost of having a clunkier setup that is far less streamlined. Since I already have an 8" Celestron Evolution telescope (among others), that would have been the cheaper route for me, but at this stage of my life, I highly value ease of use and fast setup, since my observing time is very limited.
The telescope is all aluminum with some plastic and is very sturdy and well built. While there have been some quality control issues, I think those are becoming less frequent with time, and Unistellar offers great support. So, if you receive a clunker, you won't have any issue replacing it with a better one.
Would I buy this telescope again?
Absolutely. I love using the telescope and highly recommend it if you can afford the price and the telescope matches well with your observing needs. Certainly, ten years from now, telescopes like this will be far more capable than they are now as image sensors and software continue to improve. But, this telescope should remain highly useable for many years to come.
So, I hope you found this review helpful. This is a scope that tends to elicit strong opinions. But, I've certainly enjoyed the scope a great deal, and look forward to future advancements in telescopes like this. Again, you can build your own setup that can do the same things for less money, but it likely won't be quite as portable or streamlined, nor as easy and fast to set up as the eVscope and you won't have the community science aspects to take part in.
You can watch the full review video below, and I will have some additional blog posts as I use the telescope longer, including some about basic modifications that might be worth trying if you own one of these telescopes, such as adding a finder and a dew shield. So, stay tuned for those.
For more information on the eVscope, or to buy one, head to the Unistellar website using the image link below.

Note: as an Amazon Affiliate, I earn a commission from any purchases made through Amazon links on this website.


Hello and thank you for the great review. I’ve an eVsope 2 and while removing the mirror assembly for cleaning, the mirror popped up and detached from the base and the 4 springs dropped before I noticed their correct position. I tried to place them at a few trial positions but the mirror didn’t latch securely and popped up. It was helpful to see the mirror assembly in your video, e.g. at around t=6:41 min., which helped rule out some spring positions, but I couldn't see their correct positions. I would greatly appreciate sharing the correct spring positions if you recall it. One position I tried is the same as in this video/post by Keith McCormick from the Facebook group…
I am a little confused here. You say you are reviewing the "EVScope," but that product has been supplanted by the EVScope2, albeit at a higher price point. It has much better performance, which makes me wonder why people would be interested in a review, however well done, and yours is truly excellent, of a product that is now all but superceded, and even being remaindered.
,
Very good review i have a number of setups right up to 14 inch Meade but the evscope is so easy to put out at short notice of a part clear night. I did not know about fitting a filter and have a few narrowband to hand but i could not find the link to the adaptor can you link it again.
Thanks so much for this wonderful and informative video. I was one of the original backers of this project and am glad to see that the eVscope seems to be fairly well received.